Lanai Restaurant

Lanai Restaurant
From My Home Town of San Mateo

Saturday, December 24, 2011

A Few More Photos

New foam wrapped in dacron

A sunny day in December looking towards back

Tiki candles found at thrift store

Old cruddy cushion has holes on other side

The bar is a plus in this trailer

Vintage Hawaii tablecloth

Little touches for the bar area

Out with the old...


In with the new...futon bed that is.


Here's the fabric I bought for the dinette cushions and if any left over, maybe a cover for the futon mattress.


Galley area

Humphrey's propane light

A smiling wahine! (pronounced waheenee)

Here's the Game Plan

It's winter now, actually Christmas Eve and I have a few minutes to spare to share the "game plan."  I've got alot to accomplish next year, but little by little should get her done!  So, in addition to the interior repairs I listed previously, here is the rest of my "to do list". 

1.  Remove propane only refrigerator, measure opening and replace with an electric fridge.  The RV refrigerators are too pricey, so will find an apartment or dorm room type fridge.  Will add some framing so that it won't "walk" around while I'm towing.  If I dry camp, an ice chest will work fine.  I usually camp where there are hook ups anyway.  Check out the Magic Chef oven/stove combo and pray that it works.
2.  Remove the funky Monomatic toilet (ugh).  If there is room to fit a blackwater tank, great, if not, we'll just attach a fitting for a sewer hose and I'll use full hookups when I can.  The Monomatic is a poop/pee chewing toilet with it's own tank of yuck that chews and recirculates the waste...(ugh again).
Install a new toilet. Yay.
3.  Remove the pressurized water system (most of it has been disconnected) and put in a new plastic water tank and 12 volt water pump with new water lines.  Also need to install a faucet and street water inlet.  Currently there is only a hand pump thingey. 
4.   Sew covers for the new dinette cushions.  I've already purchased nice quality replacement foam for the dinette cushions so it will be comfey to sleep on if I have a guest on board!
5.  Remove, clean and paint the cupboard/drawer pulls.
6.  Sew lined curtains for the front windows.  I put bamboo curtains around the dinette and galley areas.  They look tiki-esque!
7.  Remove lower skins and replace wood rot.  Hope it's not going to be too ugly...but...we have a feelling that it will be.  This could take months, depending on other projects we will be working on in 2012.
8. The ugly part...strip off all the silicone goop that was placed on all exterior screws, windows, eyebrows, everywhere you can imagine..horrible job ahead of us.  Then clean and putty the windows.
8.  Prep and paint the trailer...this will take quite a while...so I won't hold my breath!  After paint, will use Tiki template to add Tiki touches to exterior. 
9.  Prior to her maiden voyage...check out brakes, tires, hitch, wiring, etc.
10.  Find hubcaps to fit. 
11.  Tackle whatever other task comes up, which always does. 
HAVE FUN ALONG THE WAY!

Friday, December 16, 2011

Some of the Fun Stuff

It's December, 2011 and we won't begin to work on the Land Commander until after the holidays.  So, as I have the time, I am pulling together the "fun" stuff for my tiki getaway.  Alot of my decor was found at thrift stores, which is amazing to me!


Sunday, November 20, 2011

Window Blinds and Treatments

The Wahine has alot of windows, which actually is a plus for when you are camping and want to let the sun shine in.  I decided to break up the trailer in my mind in sections.  The front section, which has the large front window and two side windows, then the galley and dinette area windows.  What tiki trailer would be complete without fine matchstick bamboo curtains?  I ordered several nice sets in light natural color from Brookstone online and managed to get them on sale.  So the back window and dinette windows will have bamboo curtains and fabric valances above, made with my tiki fabric.  This should make for a nice finished look.  These curtains are not custom.  Each are 24" in length.  If I had custom made, each would be in the $65 range, which is too pricey.  They will fit these windows nicely.  As for the front window and two front side windows, they will get my custom sewn lined curtains in the same tiki fabric as the valances in the rear.  I like the idea of a light fabric background to keep things bright in the trailer.  Lining the curtains is a "must" in my book.  I have made curtains before that weren't lined and they not only faded quickly, but you could see through them at night with the light on.  Here's the fabric and bamboo curtains:

I won't use the bamboo valances, just fabric.

How Would YOU Tackle These Interior Problem Spots?

It's just about Thanksgiving, 2011 and I am out on a medical leave for about a month.  Feel too crappy to really DO anything to the trailer except plan.  I've taken a few photos of problem areas in the interior that I need to address...this water damage is located in the front where the main bed area/couch is located.  Most likely, there will be much more water damage found when we pull the front skins off, so this wood will probably be replaced.  If not, I'll clean this foam glopp off and paint the paneling wood a neutral color.  The shelf above this area has more water damage, and will be sanded and painted.

Next photo...
This is above door area.  Will fill in with wood putting and that's about it.  Or I can pull this same wood from one of the galley drawer bottoms and tack it over the damaged wood.  Not a big worry here.

Next photo:


The Aristocrat Company used these funky plastic shade lights in their 60's and 70's trailers and many have broken plastic shades, unless you are very lucky.  I've already placed an ad on Craigslist looking for replacements and will comb Ebay.  Most likely, I will pull the good one from the bathroom, put it here above the galley where there is more foot traffic and replace the one in the bathroom with a different design.  These are nice lights because they have electrical outlets included in the base.  Oh yes, I will sand, primer and paint the base to cover up the rust and deterioration of the metal.  The corrosion is a bit more advanced to forego primering and painting.

Next photo:  This is a typical problem with vintage trailers kept where it's damp.  Rusting and corrosion of the cabinet hardware.  This isn't bad, so I will just remove and either soak in Naval Jelly or use steel wool to clean up.  Then primer with Rustoleum and paint.  They will look like new in a couple of hours.


Next photo:

Yowsa, I hate replacing screens, but this one is small.  I'd buy replacement screen material, either in metal or plastic, use my screen roller and buy the appropriate sized screen replacement spline.  You have to make sure to pull taut on all sides, so make sure to position on the screen material with alot of overlap.  You can trim it off with an exactor knife or razor blade when satisfied with how it looks.  Doing a screen sized door would be much more challenging to get taut...this won't be bad.

Next photo:

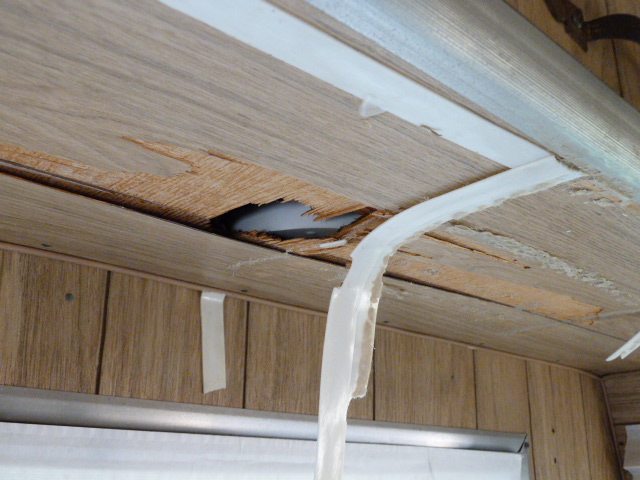
Yep, this is ugly.  And a challenge unless you have two people working on it.  I think the best way to handle this (other than taping a rattan placemat over it like the previous owner did...a quick fix but it worked!  A black widow spider was hiding under there and kept running in and out to check for food until she met her demise) is to pull the whole cabinet (this is where two people come in) and cutting and replacing the bottom and rear panels.  Someone had punched holes in both the rear and bottom, maybe to install an air conditioner?  They did a terrible job...  I would use paneling from Home Depot, and because the light colored paneling is so hard to find, will most likely paint it a nice similar color or if the replacement paneling color is similar, leave it alone.  This is a major storage area, so this one is important to repair right.  I do like the idea of putting an a/c unit here, if feasible.

Next photo...


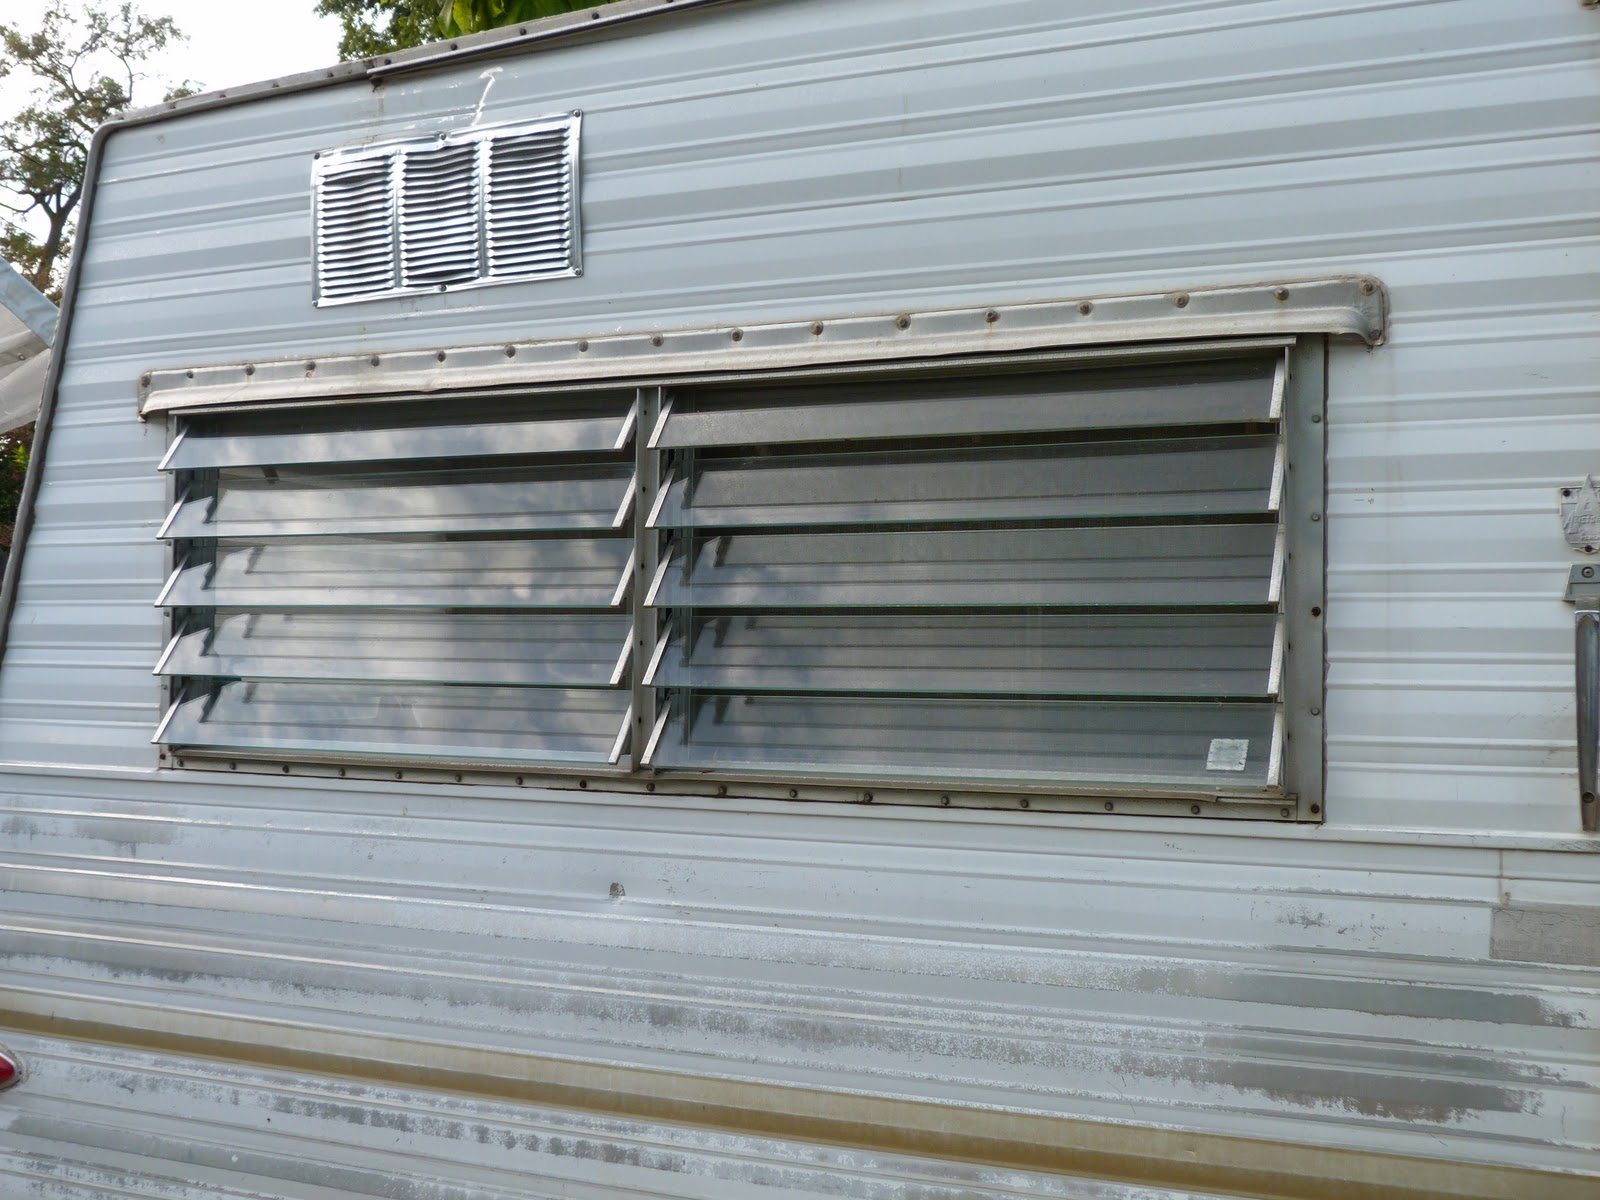
This hole is located in that same cupboard above the dinette.  The hole goes through the side trailer skins.  Previous owners put up a vent grate there, but water can easily enter through the vent.  Will either cut a piece of aluminum, putty the edges and rivet it on to cover or will replace with a better vent grid, if we can install an a/c unit in this cupboard, which is very iffey due to the small depth.

Next photo:


Rust stains on floor...there is no way to remove this big stain, not even with ZUD cleanser.  Best options, thrown a rug over it or replace or cover flooring.  Most of the flooring is very good, so most likely will do the throw rug strategy.

Next photo: 

Cooked, crumbly bed foam and rotten upholstery that smells musty.  No salvaging this for sure.  My thrifty fix for this main couch/bed was to purchase a twin sized futon mattress, 6" depth from Overstock.com for $105 (includes shipping!).  I might have ordered a double sized futon mattress but it would have stuck out a 4 inches more than the original cushions.  If my hubby and I are camping, I have an extra piece of foam in one of our other trailers I can fit in there to make it a double bed.  The new futon mattress really freshened it up and it came in a natural color cotton duck fabric.  Will probably make a washable cover for the mattress but maybe not!

Sunday, October 2, 2011

The Beginnings


My hubby and I live in Northern CA and vintage trailering is one of our favorite hobbies.  We both do the gruntwork, but he does the woodworking and heavy duty stuff.   I decided to make this trailer my island getaway, because I've been going through some health problems and after I get through all my treatments, in 2012 I plan on taking my hubby to Hawaii.  I haven't been there since 1989 and he has never been to the Islands.  A vacation long overdue. 

I bought the Land Liner from a gal I met through my ladies vintage trailer camping group called "The Trailerettes"  that I started almost 2 years ago in Northern California.  The previous owner was not comfortable towing the trailer, and would perhaps enjoy something smaller or a "camper" type setup.   A Land Commander is between 16' to 17' in length and can weigh from 2200 to 2300 lbs, depending on what's on board plumbing wise.  This trailer has some features that were pretty "cool" to people back in 1968, but I am not sure whether I will keep and utilize them...a Monomatic (sewage chewing) toilet and a pressurized water system that you have to pump air into (I actually found that the water pressure system has been taken apart, so we'll have to rebuild a conventional water system with pump).  I like things pretty simple.  The Monomatic toilets are great until they stop working, then it's impossible to find parts.  There's no black water tank.  You pour water into the toilet and it's good for 80 flushes.  Runs on 12 volt I believe.  I am going to work on this trailer kind of "ass backwards", meaning, usually we tear into replacing framing and structural damage, then the interior is worked on last.  I am going to work on the interior this Fall/Winter, as my energy and the weather allows.  Then in the spring I plan on repairing wood rot then prepping and primering the exterior.  This will take a while, as some not too informed trailer repair shop used silicone goop to seal the trailer all over...even each screw...trust me, this will be very time consuming to remove.  Silicone is not good for aluminum.  Probably the worst thing they could have done.  Ugh.   

The layout of this trailer is really neat.  There is a pull out bed at the front of the trailer.  The bunk above the bed would be good for storage if left down, but I tend to bump my head alot when I'm not looking, so I folded it up.  The galley is located on the driver's side and so is the toilet closet.  On the passenger side, there is a small dinette that folds into a bed.  Oh yes, a little side bar area just to the left side of the door.  Dual propane tanks, 12 volt battery in side storage compartment.  This baby looks TALL, of course anything is taller than my "Shorty" 1964 Aristocrat Lo Liner.  I could see where towing this might be a little intimidating.  They say that it's easier to maneuver the larger trailers than the small ones when backing them into your campsite.  I will let you know after I actually put it to the test.  So, the previous owner called the trailer "The Beast" but I will rename her "Wicked Wahine", pronounced "WA_HEE_NEE." This was the name of a perfume that was started in 1968 and sold at the Islands.    "Wahine" is a Polynesian for Hawaiian woman.   I have collected little Tiki items over the years and frequent thrift stores to satisfy my "funque and junque" collecting habit.  So, I already have a good amount of items for the decor.  And so the journey begins....